Thursday, May 31, 2012

Oil Slick

HELLO NAIL-VENTURES!!  

The mani I am showing tonight was not exactly what I intended when I sat down and started.  The look I was going for was the "Galaxy" mani that I have seen so many of  and I love to look but when I finished up with mine I thought it looked more like what oil looks like sitting in water. 

It was rather easy to do and did not require any specialty tools really... just your polish and a make up sponge.

To start with I used:
  Base Coat - NYC - Skin Tight Denim

Once this dried I used the other 4 colors
                     Sally Hansen Hard as Nails - Hot Magenta
                     Wet N Wild Fastdry - Buffy the violet slayer
                      Sinful Colors - Aqua
                      Sally Hansen Star Opal - Violet Opal  (Or you could just use any color that has a little shimmer to it )
                        
 using a piece of wax paper I made little puddles of polish and used the make up sponge to dab the different colors on to the blue base coat. (NOTE: if you cut the sponge into little pieces it will make it last SOOOO much longer) I just kind of put color where I thought it should go. If I got it on there and didn't like how it looked I just took a different color on a different part of the sponge and covered it up. The little pink stick is not a necessity but it is a nice little tool that I picked up at Sally's Beauty Supply for under 5.00.    It is used to hold the cotton ball when you have to remove polish and do not want to mess up your mani on the other fingers.  Let's face it.... accidents always happen when acetone is involved.With this mani using the stick just proved to be nice because you don't want to mess up what you have done while holding the sponge.  

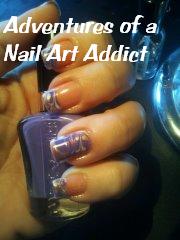
And this is what you get:

 
I do wish that the colors would have picked up better then they did.  Against the navy blue these other colors just looked amazing. 

The second picture showed the color a little better.  When I do this one again I will most definitely take pictures out side.

Well I hope you try this and if you do stop by my facebook page and share a picture.  

Last thing... tonight after keeping tabs on a Black and White Contest BerryPolished (Link Here  https://www.facebook.com/BerryPolished  ) is having I decided to enter.  My first ever contest. :)) Since I have already posted in my blog about this exact mani I did a few weeks back I just decided to share a picture of my entry.  

This contest ends tomorrow at 11:59 pm PST so if you have a great mani that is only black and white what could it hurt. Entering is the only way to win.  So as far and my entry goes I love it.  

So wish me luck and hope everyone has a fantabulous Friday ... THEN ON TO THE WEEKEND!!!!

Thanks for reading. 
Amy <3

Wednesday, May 30, 2012

ZUMBA WHAT!!??!!!

HELLO NAIL-VENTURERS!!!  Welcome back... 

Tonight I had so much fun with my friend.  This weekend we are going to a big Zumba class with 5 more of our friends.  If you don't know what Zumba is let me tell you.. IT IS AMAZING.  Another one of my many hobbies that I could do all the time but short version it is an awesome dance aerobics type of class.  
                                                   Anyway....
So Sat we are going to this class and my friend is an instructor.  So tonight I did her nails to match the outfit she will be wearing on Sat night.  Everything that is Zumba is neon and bright and very fun.. lots of color.  

This is the first time I have really done someone's nails other then mine or my daughters so it was a little weird at first.  But after lots of chatting and laughing and a great time here is the end result. 


I was not surprised that she picked the marble.  The effect just looks cool and I get the most compliments when I wear one of this style mani.  

 
Colors used here were:
Base coat - Orly Bare Rose (I have found I use this a lot when doing this mani it works great for the marble)
Swirled Colors : Wet N Wild Fast Dry Buffy the Violet Slayer
                            Claire's Neon Yellow
                             China Glaze - Liquid Leather 
Then finished off with 2 coats of clear top coat.

 I had so much fun doing this mani.  Hoping  I get a chance to do more of friends.  It was nice to sit and chat and enjoy the evening. 

Well that sums it up for tonight. Thanks for reading :)
Amy <3

Tuesday, May 29, 2012

Waterless Marble

Hello Hello fellow nail-venturers!!! Welcome to my first Nail Art post!!

I am an avid blog reader and you tube tutorial  watcher and I believe in giving credit where credit is due.  I found a facebook page belonging to Robin Moses and her nail art is FANTABULOUS!! I have been in awe of her nail art and completely obsessed with her nail tutorials. A link to Robin's facebook page.  

To my point... I get several ideas in my head and I can see the finished result... However... when it comes time to put the polish down I just can't figure out how to make it happen.  This is where Robin Moses comes in.  I found a tutorial she did about waterless marble. Now in my defense I had tried this a few times on my own and though it was working I just wasn't getting the results I wanted.  So I came across this tutorial and I wish I could find a link to it but it helped me figure out how to make my attempts better.   


I was so ecstatic with how this turned out.  I LOVED IT!! This was not my first attempt at waterless marble but it was definitely my best to date.  Now that I am doing this blog I promise to take a few more "In Process" pictures. 


First I used Orly French Manicure Bare Rose as a base coat.

After that dried I did a second coat that was very thick. I then added drops of Wet N Wild Megalast - On a Trip, Essie - Marshmallow and a no name gold that came in a Christmas set my daughter had gotten.  I then swirled these with a tooth pick. (I have seen lots that say a dotter tool works for this but they always prove to be to big for my taste) 

And here is where help from Robin Moses came in.  There are always big globs of paint when you do this. Her tip is to take your finger and slightly touch the edges and the very tip.  This helps pull some of the excess paint off and evens out the paint so it dries evenly.  

Last step was to seal with a top coat. 

I liked  this so much that I just had to do matching toes. 


    So there you have it... so far my favorite.  Since doing this mani I have done it on my daughter as well I called hers Neon Summer Swirls.  I will make a post of those soon.  I don't want to get ahead of myself.  


Thanks for reading. 
Amy <3

Welcome to my first nail-venture.  My plan for this blog is to share my adventures in nail art.  This has become my obsession and I love it. In the last few months I have learned so many things and I wanted a place to showcase my art, share what I have learned and get feed back.  There is so much to learn and share.  Thanks for reading.