Wednesday, December 26, 2012

Christmas Nail Art

Hi Guys...
I am a bad blogger I know.. I am sorry. 
The fact that I don't think I have posted anything since Halloween just is SAD! But I have been so busy that there is not even enough time for me to paint my nails much less write about them. 

So Some exciting news for me though.. Jan 4th I start school to become a Nail Tech.  (That is if the class doesn't get canceled do to lack of having enough people sign up)  I am very excited.

Ok on to what we are really here for.  I know Christmas is over but I did some stuff that I am very proud of and just want to share it all in one post.

These are inspired by Robin Moses. Also is my first attempt at any sort of faces.

These are on my best friend.  :) These too were inspired by Robin Moses.

Santa's with red tips on my friend

Loose Glitter Christmas Lights on My nails

Loose Glitter with snow and flakes on my nails

Christmas lights with fat little penguins on my friend

Candy cane accent nail with santa hat tips on my firend

Wrapping paper strips on my nails

Christmas teddy with blue tips on my nails

Santa baby (I love this red) on my nails
If I find that I have some free time I will come back and add what polishes I used.  For the Christmas teddy I used a picture tutorial that you can find on my facebook page.

I would love to hear your feed back on my work.  I hope everyone had a wonderful Christmas and if you do not celebrate Christmas I hope that your holiday was just as special and great as mine.

Much love to you all
Amy <3

Friday, October 12, 2012

Halloween Nail Art

Hi guys

I want to share all of the Halloween nail art I have had a chance to do so far.  Since there are 3 of them I will just do them all in one post. :)

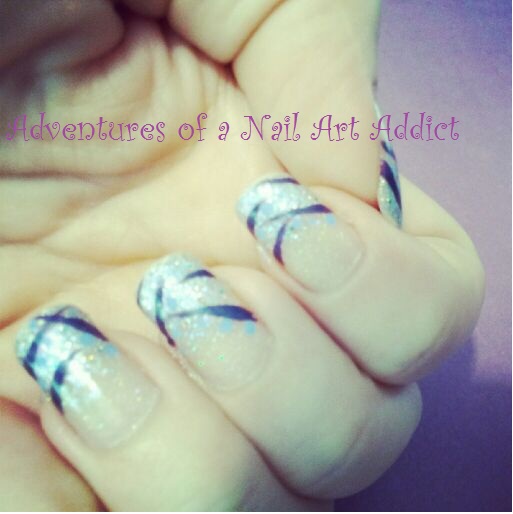
The first ones I did on the little daughters best friend.  They are inspired by Robin Moses, who I just adore. Every time she posts something new I want to try it in some form. So if you haven't seen her page check her out.  The art work is amazing.

These are "Blood Soaked Newspaper" 
I made a franken polish of several polishes and I wish I could tell you which ones I used but I can not remember (I went back later and tried to do it again and it didn't work).  But I made the color a brownish gray to represent aged newspaper.
Then using Skyy Vodka (or rubbing alcohol but the vodka worked better to transfer the ink)  i transferred the news paper ink to her nails.
Then using and watered down mix of acrylic paints I painted on the blood color around the bottom of the nail.

Turned out very cute and little daughters best friend was vary happy. :)

Next I did little daughters nails.  Her's I had to play around with because I had to many ideas on what I wanted to do.
I was searching the web looking at all the pictures when I can across one of a mani  from the Nightmare before Christmas.  I really like the ring finger and thumb. She did not have a water mark on the picture so I don't know who to give credit to for the inspiration.

I started with a Sinful colors as a base coat and then drew the rest free hand with acrylic paints. 


I love how these turned out.. and watching the little daughter walk around and show how they match up is just the funnies thing.

Then came mine.  I wanted to do something fun and traditional so I picked a typical Halloween night scene.
I started with a base coat of Sinful Colors then sponged on a gradient of Sinful Colors Rain Storm to break up the sky. The rest was drawn free hand with acrylic paints. The right hand looks a little better then the left to me but I haven't had a chance to have some one help me take a picture of both hands together. 
To finish off the sky using a small brush I added some China Glaze Fairy dust in between the trees and over the top of the house and witch.  Just to add some sparkle to the sky. 

I am in love with how the witch turned out.  I really didn't think I was going to be able to do something that small, but the detail worked out well.

So as of this week here are the Halloween manis I have done so far.  I have so many ideas and want to try them all but I don't have enough nails to do them on. 

There are still 2 and 1/2 weeks till Halloween so I am sure I will have more to post soon.

As always THANKS for reading.

Amy <3

Saturday, September 29, 2012

Color Me Rad Splatter

Today I ran my second 5k called COLOR ME RAD.  AWESOME TIME!!! I had such a blast.. If you run (or even if you don't) this 5K is just a great time.  It  isn't timed so there is plenty of time to get through it and have fun. 

The point of this fun run is to start in a White shirt and run/walk 3.1 miles while people stand on the side lines and throw colored powder and colored water at you so at the end you look like a tie dyed masterpiece (or mess haha)

So for this run I thought I would have some fun and go colorful splatter on white since I figured this is how I would look when I was done running.


 Started off with 2 coats of NYC  French White tip.
The last time I did a splatter mani I used a reg drinking straw and I just wasn't happy with how it turned out so this time I had the husband pick up some small coffee stirring straws. These worked a lot batter.
For the splatter I used :
Sally Hansen Xtreme Wear  Blue Me Away, Sun Kissed, Pretty in Hot Pink
Claire's Lime Yours
LA Colors Nuclear energy

I thought this was fun... When I do colors like this I usually use a Black base coat so for me this was a little different and I really like it.

And here is the turn out after the run of me in all my color glory....


As you can see there is color every where!!!  EVERY WHERE!!!!


But how often do you get the chance to run through the woods while people throw color at you?

Check out COLOR ME RAD and see if they are coming to where you live.  If they are I would recommend doing it. You too could be colored all over :)

Well I had a great time both doing this splatter mani and getting splattered with color everywhere else to match the splatter mani.

As always THANKS for reading
Amy <3

Wednesday, September 26, 2012

Spun Polish (and a blue velvet cupcake)

Hi guys... so sorry that my posts have been lacking lately.  I am still here!!  I am currently training for my 2nd 5K run coming up this Saturday.  Since it is close I have been most of my spare time hitting the pavement trying to get ready.  I have a fun splatter mani planned to wear on this run since the theme of the run in "COLOR ME RAD" and you start out in white and as you run they have people standing on the sides dousing you with color.  By the time your done you are definitely not wearing white any longer.  I am excited... so pictures to come of me at the finish line with my fun mani!

Ok on to today's post

I have seen this one around a lot but had not tried it my self. I have seen it called "Spun Sugar" or "Spun Polish"   I like the "Spun Polish" because that is what it is.

I started with a base coat of Sinful Colors Nirvana and while I was painting the base coat I had to little puddles of paint drying up to get ready to spin across it.  For the bottom color closest to the cuticle I used Nail Art in a light Teal. The bottle didn't have a name.  For the darker spun color I used Sinful Colors Savage.

This technique is very textured and I know some people like that.. I do not.  So I topped this off with 3 coats of Seche Vite to kind of smooth it out (it was still a little bumpy)

I was happy with how this turned out for this being my first attempt at doing it.  I will say the dryer the polish the more stringier it gets. Which to be worked the best. These pictures were taken with about 4 days wear.

NPR: I also wanted to share a picture of the last cupcakes I made. Once a month our twin boys have a cub scout family dinner.  I love to bake so every month I make some thing fun and yummy.   These things were AMAZING!!!  (and I was even rushed I can't even imagine how good they would have been I had actual time to let them cool)

 These are "Blue Velvet" Cupcakes with cream cheese icing.  Everything was made from scratch.   I found the recipe on a blog called Baked Perfection.  She has lots of YUMMY cupcakes.. I haven't had a chance to go through the whole blog yet but it you like cupcakes... Check this blog out because what I did see I want to bake every single one. :)

Alright well as always THANKS for reading...

Amy <3

Saturday, September 22, 2012

Simple Nail Art Tips Tutorial Contest Entry Dotted Rainbow Chevron

Hi Guys!!!

Last week I submitted my entry in a tutorial contest that Simple Nail Art Tips is having.  Judging started yesterday so I wanted to share my entry and a link where you can vote.

Technically this is my first picture tutorial and doing this contest gave me the opportunity to learn a new program and how to put a picture tutorial together.   So I plan on doing more in the future.

BUT RIGHT NOW I NEED YOUR VOTE!!!!

Here is the tutorial I entered.

    To vote please follow the link  Dotted Rainbow Chevron  and leave only one comment.  (Extra comments from single users do not count) .  So please take few seconds and check out all the tutorials in this contest.  You can vote for more then one tutorial, you just can not vote more then once per entry.  There is some great art work shared here and I will definitely be trying some of these techniques out.

As always THANKS for reading and I hope to see your vote for my tutorial :)

Amy <3

Monday, September 10, 2012

Color Club Fall Mani Sweepstakes VOTE FOR ME!!!

HI GUYS!!

I entered a contest and am trying to get the word out. 

My entry in this contest is located HERE.  You have to like their page on Facebook as it is a contest for their facebook fans.

So if you have a moment could you swing by and vote for my picture.


This is the picture of the fall mani I entered.

Thanks so much and as always THANKS for reading
Amy <3


Yellow and Blue

I was lost on the day I did these.  I like things on my nails that draw attention.  I love bright colors. Crazy designs.  The louder the better.  I sat down at my table and couldn't come up with a darn idea.

So I went to my favorite stand by that always looks amazing and it is easy to do with no thought required.

WATER MARBLE :)

I used 2 Sally Hansen Xtreme Wear colors
Blue me away and Mellow Yellow.
Very simple and just fun.
I started with a base coat of the Mellow Yellow and then combines the Blue me away and the Mellow Yellow in my little water cup.
Since I am in Florida and I live in flip flops I love for my toes to match so I did those too. My fingers had more of a teal green look to them since the colors were mixed in the water.  On my toes I did a waterless marble so the blue stayed true to color.

When I did these my nails were crazy long.  Before I had even had a chance to photograph them I had a ZUMBA NAILTASTOPHY.  I love Zumba and when I go, I go all out... arms waving jumping up and down... My friend standing next to me does too and while we were going all out with arms going wild our hands collided. Here is the aftermath :(

 I ended up taking almost a 1/4 inch off each nail.  The above pictures with the yellow back ground are after pictures.  I managed to save the mani. :)

Well as always THANKS for reading.
Amy <3

Sunday, September 9, 2012

Rainbow Pinwheels

I know that my posts are here and there.  I get busy and I like to spend more time doing the art on my nails then I do writing about it some times :) and I don't like swatches I just want to show off the art that I do.  That and all the kids went back to school a few weeks ago and it has taken a little while to get back into a routine.

It was probably a few months ago that I saw a post on Robin Moses' fan page about Rainbow Pinwheels she did.  I made a mental note that I liked them and wanted to try them but forgot.  Then sitting one night trying to figure out what I wanted to do I was playing with a nail wheel and did something else but it jogged my memory. 


I LOVED THE WAY THESE TURNED OUT!!!  I even did my toes to match after a few day because I liked them so much.

To do these I used a base coat of clear then used 6 colors of acrylic paints. None of the colors in the pinwheel are nail polish.

I did use Milan One Coat Glitter Charcoal to do the center of the wheel  and Stripe Rite Silver to add a little something extra to the centers.


 These were so bright and fun.  The best compliment came from the biggest burliest guy I had ever seen asked while in line at the convenient store if I really liked color.    Of course I said Yes.  He smiled and said he did too and thought they were very pretty. :)


Well... As always THANKS for reading.
I have a few posts ready so youo should see a few more here the next few days.

Amy <3

Wednesday, August 22, 2012

Hunger Game Book Cover

Welcome to all these new followers that I have.  I has been a little while since my last post because end of Summer and back to school is always a crazy time in my life.  But the last time I looked I was at 22 followers today I have 32 and well over 2200 views.  I know that as far followers go and blogging this may be a small number but just the fact that 32 people have chosen to keep track of what I do just makes my day.  :)  So Thank you.

Today I am going to share a post that I did on the Little Daughter for Back to school.  She (Like 90% of the pre-teen girl population) is OBSESSED with the Hunger Games.  Now I am not sure how I came across the video where I got the inspiration from.  Probably flipping through nail art videos on You Tube while I was bored.  But the girl who did them was I love cupcakes or I want cupcakes... something like that.  I am the worst at writing stuff like that down.  But at the same time I want to share where I got the idea from.


I started with a base coat of China Glaze Liquid Leather.  (and because I was doing her nails on a day that I had some appts to do others it took me 11 hours to finish hers because I was fitting parts in as the day when on)  Then I used a dotter and Sally Hasen Xtreme Wear Disco Ball to create the bulls eye targets on her 3 fingers.  On the thumb she wanted a D-12.  The Mocking Jay was done using acrylic paints.  I just mixed colors together until I got a color I was happy with. 
The Mocking Jay was a little harder then I anticipated.  I tried it first on paper just to see if I could do it at all and at the time I thought it was small.  When I went to do the same on her nail I realized her nail was about half the size as my original try. 
I am very pleased with how these turned out.  The little daughter was too.  :)  She loves when all of her friends love her nails  (I have to admit I do too)


I hope you like these as much as I liked doing them. 

As always THANKS for reading.

Amy<3

Sunday, August 5, 2012

Pancreatic Cancer - Purple Ribbons

Tonight I had a fun time doing my friends nails for something that is close to her heart.  She sent me a picture of a mani that she had found which was Pink ribbons for breast cancer and asked if I could pull it off in Purple for Pancreatic cancer. Of course I told her I would do my best.

I do not know exactly where she found the original picture from I would love to give credit to the original artist. 

So here they are.. Purple Ribbons for Pancreatic Cancer.

I started with a half coat of China Glaze Fairy Dust.  I then took a small brush and added a curved line of Sally Hansen Xtreme Wear Lacey Lilac over 3/4 of the nail.  I used a small cut brush to draw in the ribbon and added some shine to the bow with a small rhinestone.  Topped everything off with a coat of Seche Vite. 

The meaning behind these is precious.  We all know someone touched by cancer and I am proud to help her show her support for her family :)

As always THANKS for reading.

Amy <3

Saturday, August 4, 2012

Seeing Spots

Where do you get your inspiration from?   Me.. I get it from all over but last week  I had to clean off my craft table (I have a ginormous craft table for scrap booking and card making) because the husband has taken up tying fishing flies and he needed a place to put all his stuff.  Since I haven't done any scraping in a while I figured I could condense my table and give him half.  In doing so I went through all the paper I have.  HOLY COW talk about inspiration city.  I fell in love all over again with all the designed paper I had picked out.  Only now I wanted to take all those designs and put them on my nails.  :)

The first one I picked is so much fun.  Flowers, Circles, Dots and tons of COLOR!!!!. I LOVE IT!!
Here is a picture of the paper itself .

I started out with a base coat of China Glaze Liquid Leather and then I am just going to list all the colors I used because there are a ton of them.
China Glaze Tree Hugger
Orly Snow Cone
Finger Paints Tiffany Imposter
NYC Lincoln Square
Pure Ice Hot Tamale
Sinful Colors Savage
Sally Hansen Xtreme Wear Mellow Yellow
Sally Hansen Xtreme Wear Fuscia Power
Pure Ice Siren

I used 3 different size dotting tools (I don't really have dotting tools I have dry embossing tools that work the same)  to make the designs.

I finished it off with a top coat of NYC Matte Me Crazy.  I love the matte finish over the Black with all these colors.  It just makes the color pop. 


I had a good time doing these.  :)

Don't forget that when MY FACEBOOK PAGE reaches 200 fans I am going to have a nail art contest.  So if you haven't liked my page stop by and check it out. 

As always THANKS for reading
Amy <3

Thursday, August 2, 2012

All that Glitters

Last night I had a plan when I sat down.. this was not it at all.

Funny how that works :)

I may go for my original plan again tonight if I have time.


I started this out with a base coat and then a thick coat of China Glaze Fairy Dust. I would not have even bought this polish had a friend not had it and I realized how awesome it is.  It is like 1000's of little diamonds all over your nail.. Pictures DO NOT do it justice. even though I tried to get how shiny it is.  I then did a gradient with China Glaze Liquid Crystal. This again.. so shiny.. I loved it just the way it was but I just can;t leave stuff alone.  So I add Orly Mysterious Curse (found this one on clearance at Sally's YAY!!) with a striping brush and with a dotting tool added some little dots along the strips.  

This is a fairly easy look.  The hardest part was the getting the glitter gradient to fade. I did this free hand with the bottle crush because a sponge just didn't work at all.

I am not 100% crazy about the strips so tonight I think I will take those off leaving the glitter and try out my first idea and see if I can get it on my nails as I see it in my head. :)

Don't forget about he nail art contest I am going to be having when my facebook page reaches 200 fans.
Drop by say hi.. show off what your wearing this weekend in my Weekend Showcase.


As always THANKS for reading
Amy <3